

Description
About this Course
Designed to empower *anyone* to create visual content — this highly practical, worldwide recognised study programme delivered by designers live incorporates the leading industry tools required to bring any idea to life without the need to be creative. So whether life as a graphic designer sounds like a dream or you’d like to gain the core design skills to craft your own projects freely — this is the secret to awesome success.
Firstly, you’ll dive into learning the fundamentals of graphic design through project-based learning & case studies. Next, you’ll be introduced to the exciting world of Adobe Photoshop to combine, retouch & manipulate images. You’ll then move on to create vector graphics with Adobe Illustrator, from icons to design packaging to digital graphics & social content. Finally, you’ll get your hands dirty with Adobe InDesign by learning how to create presentations, brochures, business cards, digital magazines, posters & interactive PDFs. All along, our industry experts will share workflows and best practices through experience, using a learn-by-doing approach.
By the end of this exciting and rewarding course, you will be able to achieve a globally recognised Adobe Professional certificate and proudly showcase your own portfolio of work. Roll up your sleeves for game-changing learning, it’s time to go from inspiration to creation.

 |
The Graphic Designer Associate study programme is an MQF Level 5 Award (5 ECTS) titled ‘VET Award for Graphic Design Associate with Adobe Creative Suite’ by the National Commission for Further & Higher Education. This continues to confirm the relevance of the MySuccess industry-designed study programmes. |
Course Outline
- Image File Formats
- Pixel vs Vector
- Resolution
- Colour Models
- Typography
- Useful Tools
- Introducing The Workspace
- Getting familiar with the Tools Panel
- Switching tools using the keyboard
- Dark or Light Interface
- Navigating your image, tabs and windows
- Panels and workspaces
- Zooming in and zooming out
- Entering a custom zoom value
- Scrolling and panning images
- Rotating the view
- Working with tabbed documents
- Arranging documents
- Cycling between screen modes
- Switching tools using the keyboard
- Customizing the keyboard shortcuts
- The Basics of Layers
- The Background layer
- Using a layer mask instead of deleting pixels
- Naming, hiding, creating, aligning and deleting layers
- Altering the stacking order of layers
- Layer transformations
- Aligning and distributing layers
- Changing the opacity of layers
- Grouping layers
- Merge or rasterise layers
- Flatten or Save As?
- Applying a clipping mask
- Filtering layers
- Best Practises
- Crop and Straighten
- The new and improved Crop tool
- Straightening a crooked image
- Using the Perspective Crop tool
- Automatically Cropping and Straightening scanned images
- The Rule of Thirds
- Extending Images
- Creating a border around your image
- Extending the canvas
- Using Content Aware Extend
- Using Content Aware Fill
- Using Content Aware Scale
- Adjusting Image Luminance
- Let there be Luminance
- The Auto commands
- Adjustments using Brightness/Contrast, Level and Curves
- Working non-destructively with adjustment layers
- Editing adjustment layers
- Isolating an adjustment with a layer mask
- Hello to the histogram
- Basics of the Shadows/Highlights command
- Adjusting Colours
- Assessing an image
- Identifying a colour cast and how to correct it
- Correcting a colour cast automatically
- Changing the colour balance using levels
- Changing the colour balance using Colour Balance
- Adjusting colour intensity with Vibrance
- The Hue/Saturation command
- The Undo and the History Panel
- Undo
- Utilising the History Panel
- Creating a Snapshot
- Creating a new Document from a History State
- Selections
- What are selections and why we use them?
- The Marquee tools
- Getting to know the Lasso tools
- Magic Wand and Quick Mask tools
- Adding to and subtracting from Selections
- Modifying Selections
- Saving and Loading Selections
- Meet the Channels Panel
- Masking
- Understanding what a mask is and does
- Working with Layer Masks
- Basic Retouching
- Using the Spot Healing Brush
- Using the Healing Brush
- Using the Patch Tool
- The ‘good old‘ Clone Stamp tool
- The Dodge and Burn tools
- Tips and Tricks
- Basic Brushes
- An overview of brushes and the Brushes panel
- Brush size and hardness
- Brush shortcuts
- Working with Colour
- The Swatches Panel
- The Colour Panel
- The Colour Picker
- Using the Eyedropper Tool to sample colour
- Creating simple gradients
- Simple compositing
- The various options for copying and pasting
- Dragging and dropping
- Placing an image
- Smart Objects and why when to use them
- Saving Your Work
- Saving images to PSD
- Saving images to TIFF
- File Formats and which to use
- Best practises
- Using the Save For Web utility
- The Colour Modes explained
- Getting to grips with text
- Horizontal and Vertical type tools
- Customising font properties
- The Character panel
- The Paragraph panel
- Managing text layers
- Working smarter with Bridge
- Opening and organising files
- Viewing, choosing and assessing images
- Adding Metadata and Keywords
- Working with Batches and Actions
- Collections and Smart Collections
- Labelling and Filtering
- Camera RAW
- Difference between RAW and compressed images
- Intro to Adobe Camera RAW
- Camera RAW Filter in Photoshop
- Retouching
- Working on a actual retouching projects, non-destructively
- Scaling tips
- Working with all the Liquify tools
- Improve body shape and detail
- Adjusting Image Luminance
- Editing with the histogram
- Customizing a Levels adjustment
- Understanding the Gamma value
- Making channel-by-channel adjustments
- Simulating a Grey Card
- Customising a Curves adjustment
- Colour adjustment by the numbers
- Tips and tricks
- Shadows/Highlights
- Working non-destructively with Shadows/Highlights
- Shadows Highlights techniques
- The Radius values explained
- Enhancing the effects of Midtone Contrast
- Masking a group of Smart Filters
- Working with Type
- Creating point text
- Choosing fonts and type style tricks
- A run through of the Character and Paragraph panels
- Kerning and tracking characters
- Creating and editing area text
- Selecting and formatting paragraphs
- Using Paragraph Styles
- Using Character Styles
- Setting text inside a custom path
- Creating text along a path
- Masking text into image elements
- Anti-aliasing explained
- Working with Vectors
- The other vector-based layer
- Drawing a dashed or dotted border
- Drawing and aligning custom shapes
- Combining simple shapes
- Cropping and merging shapes
- Adjusting Live Shape attributes
- Working with the pen tool
- Layer Styles and Effects
- Applying and creating Layer Styles
- Loading and customizing Layer Styles
- Merging and saving Layer Styles
- Copying Layer Styles
- Depth, contour, and texture
- Imparting depth with a layer effect
- Creating shadows
- Bevel and Emboss
- Modifying a layer’s effects
- Saving custom default settings
- Creating a custom contour
- Global Light and rasterizing effects
- Surface contour
- Adding textures
- Scale, Rotate, Skew, and Warp
- Meet the transformations
- Transformation and Smart Objects
- Content aware Move
- Content Aware Extend
- Rotating a layer with Free Transform
- Scale, duplicate, repeat, distort, perspective, and skew
- Working with Greyscale and Black & White
- Convert to black and white
- Several ways to convert to greyscale
- Mixing a custom black-and-white image
- The Black & White command
- Customizing the Black & White settings
- Black & White or Channel Mixer
- Creating a sepia tone
- Selections and Masking
- Adding to and subracting from Selections
- Feathering a selection
- Refine Edge and Refine Mask
- Working with the Mask panel
- Modifying Selections
- Saving and Loading Selections
- Viewing a mask with or without its image
- Painting directly inside an alpha channel
- Correcting fringes around a masked layer
- Turning a layer into a knockout
- Selecting with the Colour Range command
- Selecting Skin Tones
- Selecting a complex image with Colour Range
- Refining a selection in the Quick Mask mode
- Sharpening Details
- Understanding the Smart Sharpen filter
- Understanding the Unsharp Mask filter
- Assessing the best sharpening practises
- Sharpening with High Pass
- Sharpening using Smart Filters
- Noise and Detail
- The Noise/Details balancing act
- Introducing the Reduce Noise filter
- Brushing away blur and sharpening
- Creating texture by adding noise
- Correcting noise in Camera Raw
- Working with the Median filter
- Saving for the Web
- Producing a suitable JPEG image
- Producing a suitable GIF image
- Working with colours to reduce file size
- PNG and PNG
- Viewing results in a browser
- Printing and Outputting
- The main print options
- Description and printing marks
- Applying bleed
- The Colour Settings
- Previewing an image at print size
- Creating contact sheets
- Creating a web gallery
- Introducing The Workspace
- Getting To Know Illustrator
- Setting Up a Document
- Familiarising With Tools
- Working With Selection Tools
- Creating, Editing Shapes & Aligning
- Use of Open Paths
- Aligning Shapes & Paths
- Applying Effects
- Working With Symbols
- Working With Brushes
- Use of Preset Brushes
- Customizing Own Brushes
- Transforming Objects
- Working With Transform Tool
- Drawing With The Pen Tool
- Color & Painting
- Working With Blob Brush
- Working With Gradient Tools
- Working With Mesh Tool
- Blending Colors & Shapes
- Working With Type
- Text Manipulation
- Working With Perspective Drawing
- 3D Effects In Illustrator
- Converting 2D to 3D Design
- Creating 3D Text
- Exporting File For Animation
- Introducing The Workspace
- Getting To Know InDesign
- Setting Up a Document
- Familiarising with Tools
- Working With Pages & Objects
- Page Settings
- Applying Effects
- Styling Frames
- Setting Images in Frame
- Flowing & Editing Text
- Paragraphs
- Special Text
- Page Number & Footers
- Font Styles Customization
- Forms & Tables
- Working With Typography
- Text Design Concepts
- Text, Images & Paths
- Working With Styles & Color
- Gradients & Colors
- Transparency
- Importing & Modifying Graphics
- Frames & Images
- Interactive Gallery
- Printing & Exporting
- Creating Adobe PDF Files
- Forms
- Interactive Documents
- Creating & Exporting An E-Book
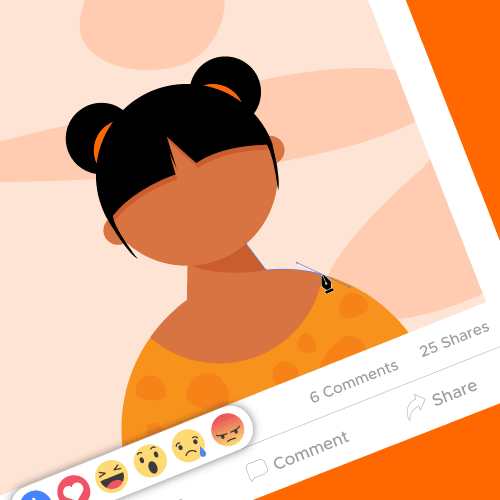
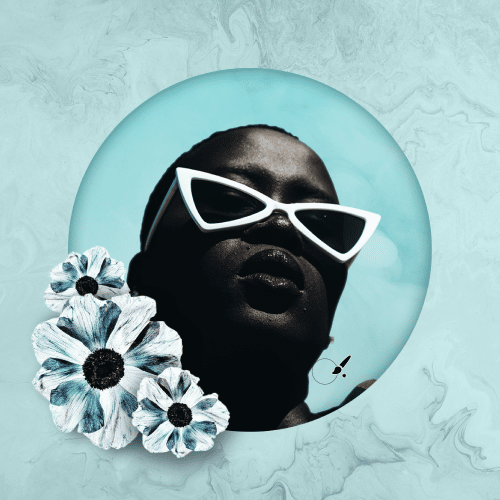
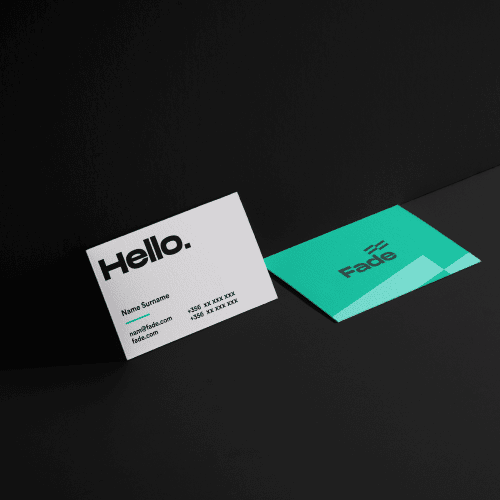
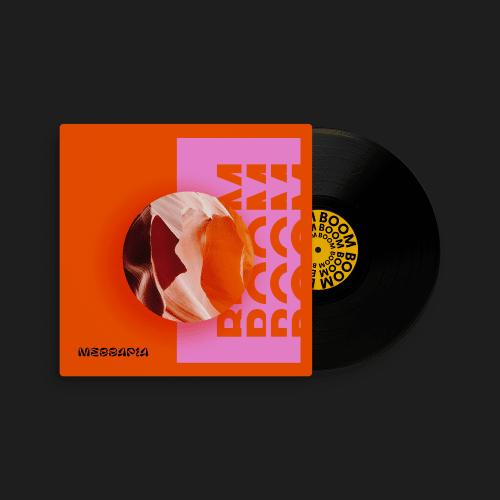
Student Projects
Want to create work like this? You can. Gain the skills which will give you the freedom to design at this level.


Students say it best. Here's Claire's story.

Assessment & Certification
 |
Upon completion of the Graphic Designer Associate course, students are encouraged to sit for the Adobe Certified Professional exams (formerly known as Adobe Certified Associate ACA) in Photoshop, Illustrator & InDesign within a maximum timeframe of 6 months.
Each exam is 50 minutes long and consists of ~33 multiple-choice and live-in-the-application questions. The passing score for each exam is 70%. The exam is hosted at ICE Malta with the result being made available straight after the exam session. Once a student achieves a pass in all three applications and completes the course successfully, they will achieve the EQF/MQF Level 5 certificate. |
Funding
 |
Students completing the Graphic Designer Associate Course can apply for the Get Qualified Scheme which will enable them to benefit from a tax credit of 70% of the costs incurred (i.e. €910 will be refunded back for this course).
For further details and assistance on how to apply for this scheme, kindly contact us for an appointment. |
Pay Monthly
 |
Thanks to ICE Malta’s Easy Payment Scheme, you can design an interest-free monthly payment plan to cover your tuition. No banks involved. Discover more. |
Course Details
MODE OF STUDY
PARTTIME - Online Live
DELIVERY METHOD
Lectures & Hands-On Practice
ENTRY REQUIREMENTS
Good Knowledge of English
No design experience necessary. Seriously.
ONLINE CLASS REQUIREMENTS
Mac or Windows PC
WebCam
Stable Internet Connection
Adobe Creative Cloud Suite
NEXT STEPS
MySuccess Website Designer Associate
DURATION
60 hours (20 Lessons of 3 Hours)
DAY(S)
Tuesday & Thursday
TIME
6.00PM till 9.00PM
STARTING DATE
Tuesday 16th April 2024
END DATE
Thursday 20th June 2024
WHAT'S INCLUDED
- Training by an Adobe Certified Educator
- Detailed Educator Presentations
- Official Adobe Courseware (Format: Digital)
- Official Adobe Practice Tests
- Official Adobe Exams (x1 Sit Per Module)
- 6-Months Post-Course Educator Email Support
- 7-Day Lesson Playback (Rewatch On-Demand) NEW
Price: € 1300
€
Designed to empower *anyone* to create visual content — this highly practical, worldwide recognised study programme delivered by designers live incorporates the leading industry tools required to bring any idea to life without the need to be creative. So whether life as a graphic designer sounds like a dream or you’d like to gain the core design skills to craft your own projects freely — this is the secret to awesome success.
Firstly, you’ll dive into learning the fundamentals of graphic design through project-based learning & case studies. Next, you’ll be introduced to the exciting world of Adobe Photoshop to combine, retouch & manipulate images. You’ll then move on to create vector graphics with Adobe Illustrator, from icons to design packaging to digital graphics & social content. Finally, you’ll get your hands dirty with Adobe InDesign by learning how to create presentations, brochures, business cards, digital magazines, posters & interactive PDFs. All along, our industry experts will share workflows and best practices through experience, using a learn-by-doing approach.
By the end of this exciting and rewarding course, you will be able to achieve a globally recognised Adobe Professional certificate and proudly showcase your own portfolio of work. Roll up your sleeves for game-changing learning, it’s time to go from inspiration to creation.
|
The Graphic Designer Associate study programme is an MQF Level 5 Award (5 ECTS) titled ‘VET Award for Graphic Design Associate with Adobe Creative Suite’ by the National Commission for Further & Higher Education. This continues to confirm the relevance of the MySuccess industry-designed study programmes. |
- Image File Formats
- Pixel vs Vector
- Resolution
- Colour Models
- Typography
- Useful Tools
- Introducing The Workspace
- Getting familiar with the Tools Panel
- Switching tools using the keyboard
- Dark or Light Interface
- Navigating your image, tabs and windows
- Panels and workspaces
- Zooming in and zooming out
- Entering a custom zoom value
- Scrolling and panning images
- Rotating the view
- Working with tabbed documents
- Arranging documents
- Cycling between screen modes
- Switching tools using the keyboard
- Customizing the keyboard shortcuts
- The Basics of Layers
- The Background layer
- Using a layer mask instead of deleting pixels
- Naming, hiding, creating, aligning and deleting layers
- Altering the stacking order of layers
- Layer transformations
- Aligning and distributing layers
- Changing the opacity of layers
- Grouping layers
- Merge or rasterise layers
- Flatten or Save As?
- Applying a clipping mask
- Filtering layers
- Best Practises
- Crop and Straighten
- The new and improved Crop tool
- Straightening a crooked image
- Using the Perspective Crop tool
- Automatically Cropping and Straightening scanned images
- The Rule of Thirds
- Extending Images
- Creating a border around your image
- Extending the canvas
- Using Content Aware Extend
- Using Content Aware Fill
- Using Content Aware Scale
- Adjusting Image Luminance
- Let there be Luminance
- The Auto commands
- Adjustments using Brightness/Contrast, Level and Curves
- Working non-destructively with adjustment layers
- Editing adjustment layers
- Isolating an adjustment with a layer mask
- Hello to the histogram
- Basics of the Shadows/Highlights command
- Adjusting Colours
- Assessing an image
- Identifying a colour cast and how to correct it
- Correcting a colour cast automatically
- Changing the colour balance using levels
- Changing the colour balance using Colour Balance
- Adjusting colour intensity with Vibrance
- The Hue/Saturation command
- The Undo and the History Panel
- Undo
- Utilising the History Panel
- Creating a Snapshot
- Creating a new Document from a History State
- Selections
- What are selections and why we use them?
- The Marquee tools
- Getting to know the Lasso tools
- Magic Wand and Quick Mask tools
- Adding to and subtracting from Selections
- Modifying Selections
- Saving and Loading Selections
- Meet the Channels Panel
- Masking
- Understanding what a mask is and does
- Working with Layer Masks
- Basic Retouching
- Using the Spot Healing Brush
- Using the Healing Brush
- Using the Patch Tool
- The ‘good old‘ Clone Stamp tool
- The Dodge and Burn tools
- Tips and Tricks
- Basic Brushes
- An overview of brushes and the Brushes panel
- Brush size and hardness
- Brush shortcuts
- Working with Colour
- The Swatches Panel
- The Colour Panel
- The Colour Picker
- Using the Eyedropper Tool to sample colour
- Creating simple gradients
- Simple compositing
- The various options for copying and pasting
- Dragging and dropping
- Placing an image
- Smart Objects and why when to use them
- Saving Your Work
- Saving images to PSD
- Saving images to TIFF
- File Formats and which to use
- Best practises
- Using the Save For Web utility
- The Colour Modes explained
- Getting to grips with text
- Horizontal and Vertical type tools
- Customising font properties
- The Character panel
- The Paragraph panel
- Managing text layers
- Working smarter with Bridge
- Opening and organising files
- Viewing, choosing and assessing images
- Adding Metadata and Keywords
- Working with Batches and Actions
- Collections and Smart Collections
- Labelling and Filtering
- Camera RAW
- Difference between RAW and compressed images
- Intro to Adobe Camera RAW
- Camera RAW Filter in Photoshop
- Retouching
- Working on a actual retouching projects, non-destructively
- Scaling tips
- Working with all the Liquify tools
- Improve body shape and detail
- Adjusting Image Luminance
- Editing with the histogram
- Customizing a Levels adjustment
- Understanding the Gamma value
- Making channel-by-channel adjustments
- Simulating a Grey Card
- Customising a Curves adjustment
- Colour adjustment by the numbers
- Tips and tricks
- Shadows/Highlights
- Working non-destructively with Shadows/Highlights
- Shadows Highlights techniques
- The Radius values explained
- Enhancing the effects of Midtone Contrast
- Masking a group of Smart Filters
- Working with Type
- Creating point text
- Choosing fonts and type style tricks
- A run through of the Character and Paragraph panels
- Kerning and tracking characters
- Creating and editing area text
- Selecting and formatting paragraphs
- Using Paragraph Styles
- Using Character Styles
- Setting text inside a custom path
- Creating text along a path
- Masking text into image elements
- Anti-aliasing explained
- Working with Vectors
- The other vector-based layer
- Drawing a dashed or dotted border
- Drawing and aligning custom shapes
- Combining simple shapes
- Cropping and merging shapes
- Adjusting Live Shape attributes
- Working with the pen tool
- Layer Styles and Effects
- Applying and creating Layer Styles
- Loading and customizing Layer Styles
- Merging and saving Layer Styles
- Copying Layer Styles
- Depth, contour, and texture
- Imparting depth with a layer effect
- Creating shadows
- Bevel and Emboss
- Modifying a layer’s effects
- Saving custom default settings
- Creating a custom contour
- Global Light and rasterizing effects
- Surface contour
- Adding textures
- Scale, Rotate, Skew, and Warp
- Meet the transformations
- Transformation and Smart Objects
- Content aware Move
- Content Aware Extend
- Rotating a layer with Free Transform
- Scale, duplicate, repeat, distort, perspective, and skew
- Working with Greyscale and Black & White
- Convert to black and white
- Several ways to convert to greyscale
- Mixing a custom black-and-white image
- The Black & White command
- Customizing the Black & White settings
- Black & White or Channel Mixer
- Creating a sepia tone
- Selections and Masking
- Adding to and subracting from Selections
- Feathering a selection
- Refine Edge and Refine Mask
- Working with the Mask panel
- Modifying Selections
- Saving and Loading Selections
- Viewing a mask with or without its image
- Painting directly inside an alpha channel
- Correcting fringes around a masked layer
- Turning a layer into a knockout
- Selecting with the Colour Range command
- Selecting Skin Tones
- Selecting a complex image with Colour Range
- Refining a selection in the Quick Mask mode
- Sharpening Details
- Understanding the Smart Sharpen filter
- Understanding the Unsharp Mask filter
- Assessing the best sharpening practises
- Sharpening with High Pass
- Sharpening using Smart Filters
- Noise and Detail
- The Noise/Details balancing act
- Introducing the Reduce Noise filter
- Brushing away blur and sharpening
- Creating texture by adding noise
- Correcting noise in Camera Raw
- Working with the Median filter
- Saving for the Web
- Producing a suitable JPEG image
- Producing a suitable GIF image
- Working with colours to reduce file size
- PNG and PNG
- Viewing results in a browser
- Printing and Outputting
- The main print options
- Description and printing marks
- Applying bleed
- The Colour Settings
- Previewing an image at print size
- Creating contact sheets
- Creating a web gallery
- Introducing The Workspace
- Getting To Know Illustrator
- Setting Up a Document
- Familiarising With Tools
- Working With Selection Tools
- Creating, Editing Shapes & Aligning
- Use of Open Paths
- Aligning Shapes & Paths
- Applying Effects
- Working With Symbols
- Working With Brushes
- Use of Preset Brushes
- Customizing Own Brushes
- Transforming Objects
- Working With Transform Tool
- Drawing With The Pen Tool
- Color & Painting
- Working With Blob Brush
- Working With Gradient Tools
- Working With Mesh Tool
- Blending Colors & Shapes
- Working With Type
- Text Manipulation
- Working With Perspective Drawing
- 3D Effects In Illustrator
- Converting 2D to 3D Design
- Creating 3D Text
- Exporting File For Animation
- Introducing The Workspace
- Getting To Know InDesign
- Setting Up a Document
- Familiarising with Tools
- Working With Pages & Objects
- Page Settings
- Applying Effects
- Styling Frames
- Setting Images in Frame
- Flowing & Editing Text
- Paragraphs
- Special Text
- Page Number & Footers
- Font Styles Customization
- Forms & Tables
- Working With Typography
- Text Design Concepts
- Text, Images & Paths
- Working With Styles & Color
- Gradients & Colors
- Transparency
- Importing & Modifying Graphics
- Frames & Images
- Interactive Gallery
- Printing & Exporting
- Creating Adobe PDF Files
- Forms
- Interactive Documents
- Creating & Exporting An E-Book
Want to create work like this? You can. Gain the skills which will give you the freedom to design at this level.
Students say it best. Here's Claire's story.
|
Upon completion of the Graphic Designer Associate course, students are encouraged to sit for the Adobe Certified Professional exams (formerly known as Adobe Certified Associate ACA) in Photoshop, Illustrator & InDesign within a maximum timeframe of 6 months.
Each exam is 50 minutes long and consists of ~33 multiple-choice and live-in-the-application questions. The passing score for each exam is 70%. The exam is hosted at ICE Malta with the result being made available straight after the exam session. Once a student achieves a pass in all three applications and completes the course successfully, they will achieve the EQF/MQF Level 5 certificate. |
|
Students completing the Graphic Designer Associate Course can apply for the Get Qualified Scheme which will enable them to benefit from a tax credit of 70% of the costs incurred (i.e. €910 will be refunded back for this course).
For further details and assistance on how to apply for this scheme, kindly contact us for an appointment. |
Pay Monthly
|
Thanks to ICE Malta’s Easy Payment Scheme, you can design an interest-free monthly payment plan to cover your tuition. No banks involved. Discover more. |
MODE OF STUDY
PARTTIME - Online Live
DELIVERY METHOD
Lectures & Hands-On Practice
ENTRY REQUIREMENTS
Good Knowledge of English
No design experience necessary. Seriously.
ONLINE CLASS REQUIREMENTS
Mac or Windows PC
WebCam
Stable Internet Connection
Adobe Creative Cloud Suite
NEXT STEPS
MySuccess Website Designer Associate
DURATION
60 hours (20 Lessons of 3 Hours)
DAY(S)
Tuesday & Thursday
TIME
6.00PM till 9.00PM
STARTING DATE
Tuesday 16th April 2024
END DATE
Thursday 20th June 2024
WHAT'S INCLUDED
- Training by an Adobe Certified Educator
- Detailed Educator Presentations
- Official Adobe Courseware (Format: Digital)
- Official Adobe Practice Tests
- Official Adobe Exams (x1 Sit Per Module)
- 6-Months Post-Course Educator Email Support
- 7-Day Lesson Playback (Rewatch On-Demand) NEW
Price: € 1300
€